This article is one of Metal Toad's Top 10 React JS Tips. Enjoy!
This is a three part post about our experience using AWS Amplify to develop a food logging app for the Metal Toad hackathon. Here in part one we cover the initial project overview/setup and our experience implementing Amplify Auth. Part two will cover Amplify Storage, with part three covering Amplify AppSync and PubSub.
At least once a year Metal Toad hosts a hackathon over a two day period. Over that period teams will design, develop, present, and demo their application. For this hackathon we were tasked with creating an application whose content is managed by Amplify, a library provided by Amazon Web Services (AWS) to build cloud connected applications. Amplify provides many capabilities a developer may need right out of the box, such as user authentication, storage, and even a database connection to the app. This is a fascinating technology and an excellent choice for an agency that thrives on the edge of innovation!
Our team came up with the idea of a simple social media style food logging app, hence the awesome throwback name of Floggr! The app body would consist of a feed of food posts that users had eaten with a type ahead combo box providing a list of foods to eat or log. It would also handle creating and signing in users, as well as storing user avatars. We believed this would be achievable in the two day hackathon using libraries provided by Amplify.
Amplify Tools
We did some initial research to find out some of the capabilities of Amplify and what features we could leverage. The main features we found were AppSync, Auth, and Storage.
AppSync provides a GraphQL schema connected to a database in AWS. The coolest feature of AppSync being able to subscribe to live updates from the database using the PubSub interface. Even though most social media sites do not have live updates to their feeds, we wanted to try and out, so our food feed would provide live updates every time someone logged a new food.
Auth is an authentication wrapper for the app that provides account creation, sign on, and authentication. In its simplest least configurable form, you may integrate this into your app in one line of code. Crazy! User authentication can be one of the biggest headaches in developing an application, to get started this easy is a definite game changer.
Storage provides the ability to store user data in AWS using s3 buckets for media or a database for structured data. Our goal was to use the media storage for storing a user avatar.
UX
Saki, our designer, designed a mock up of what we were hoping to implement. She did a great job!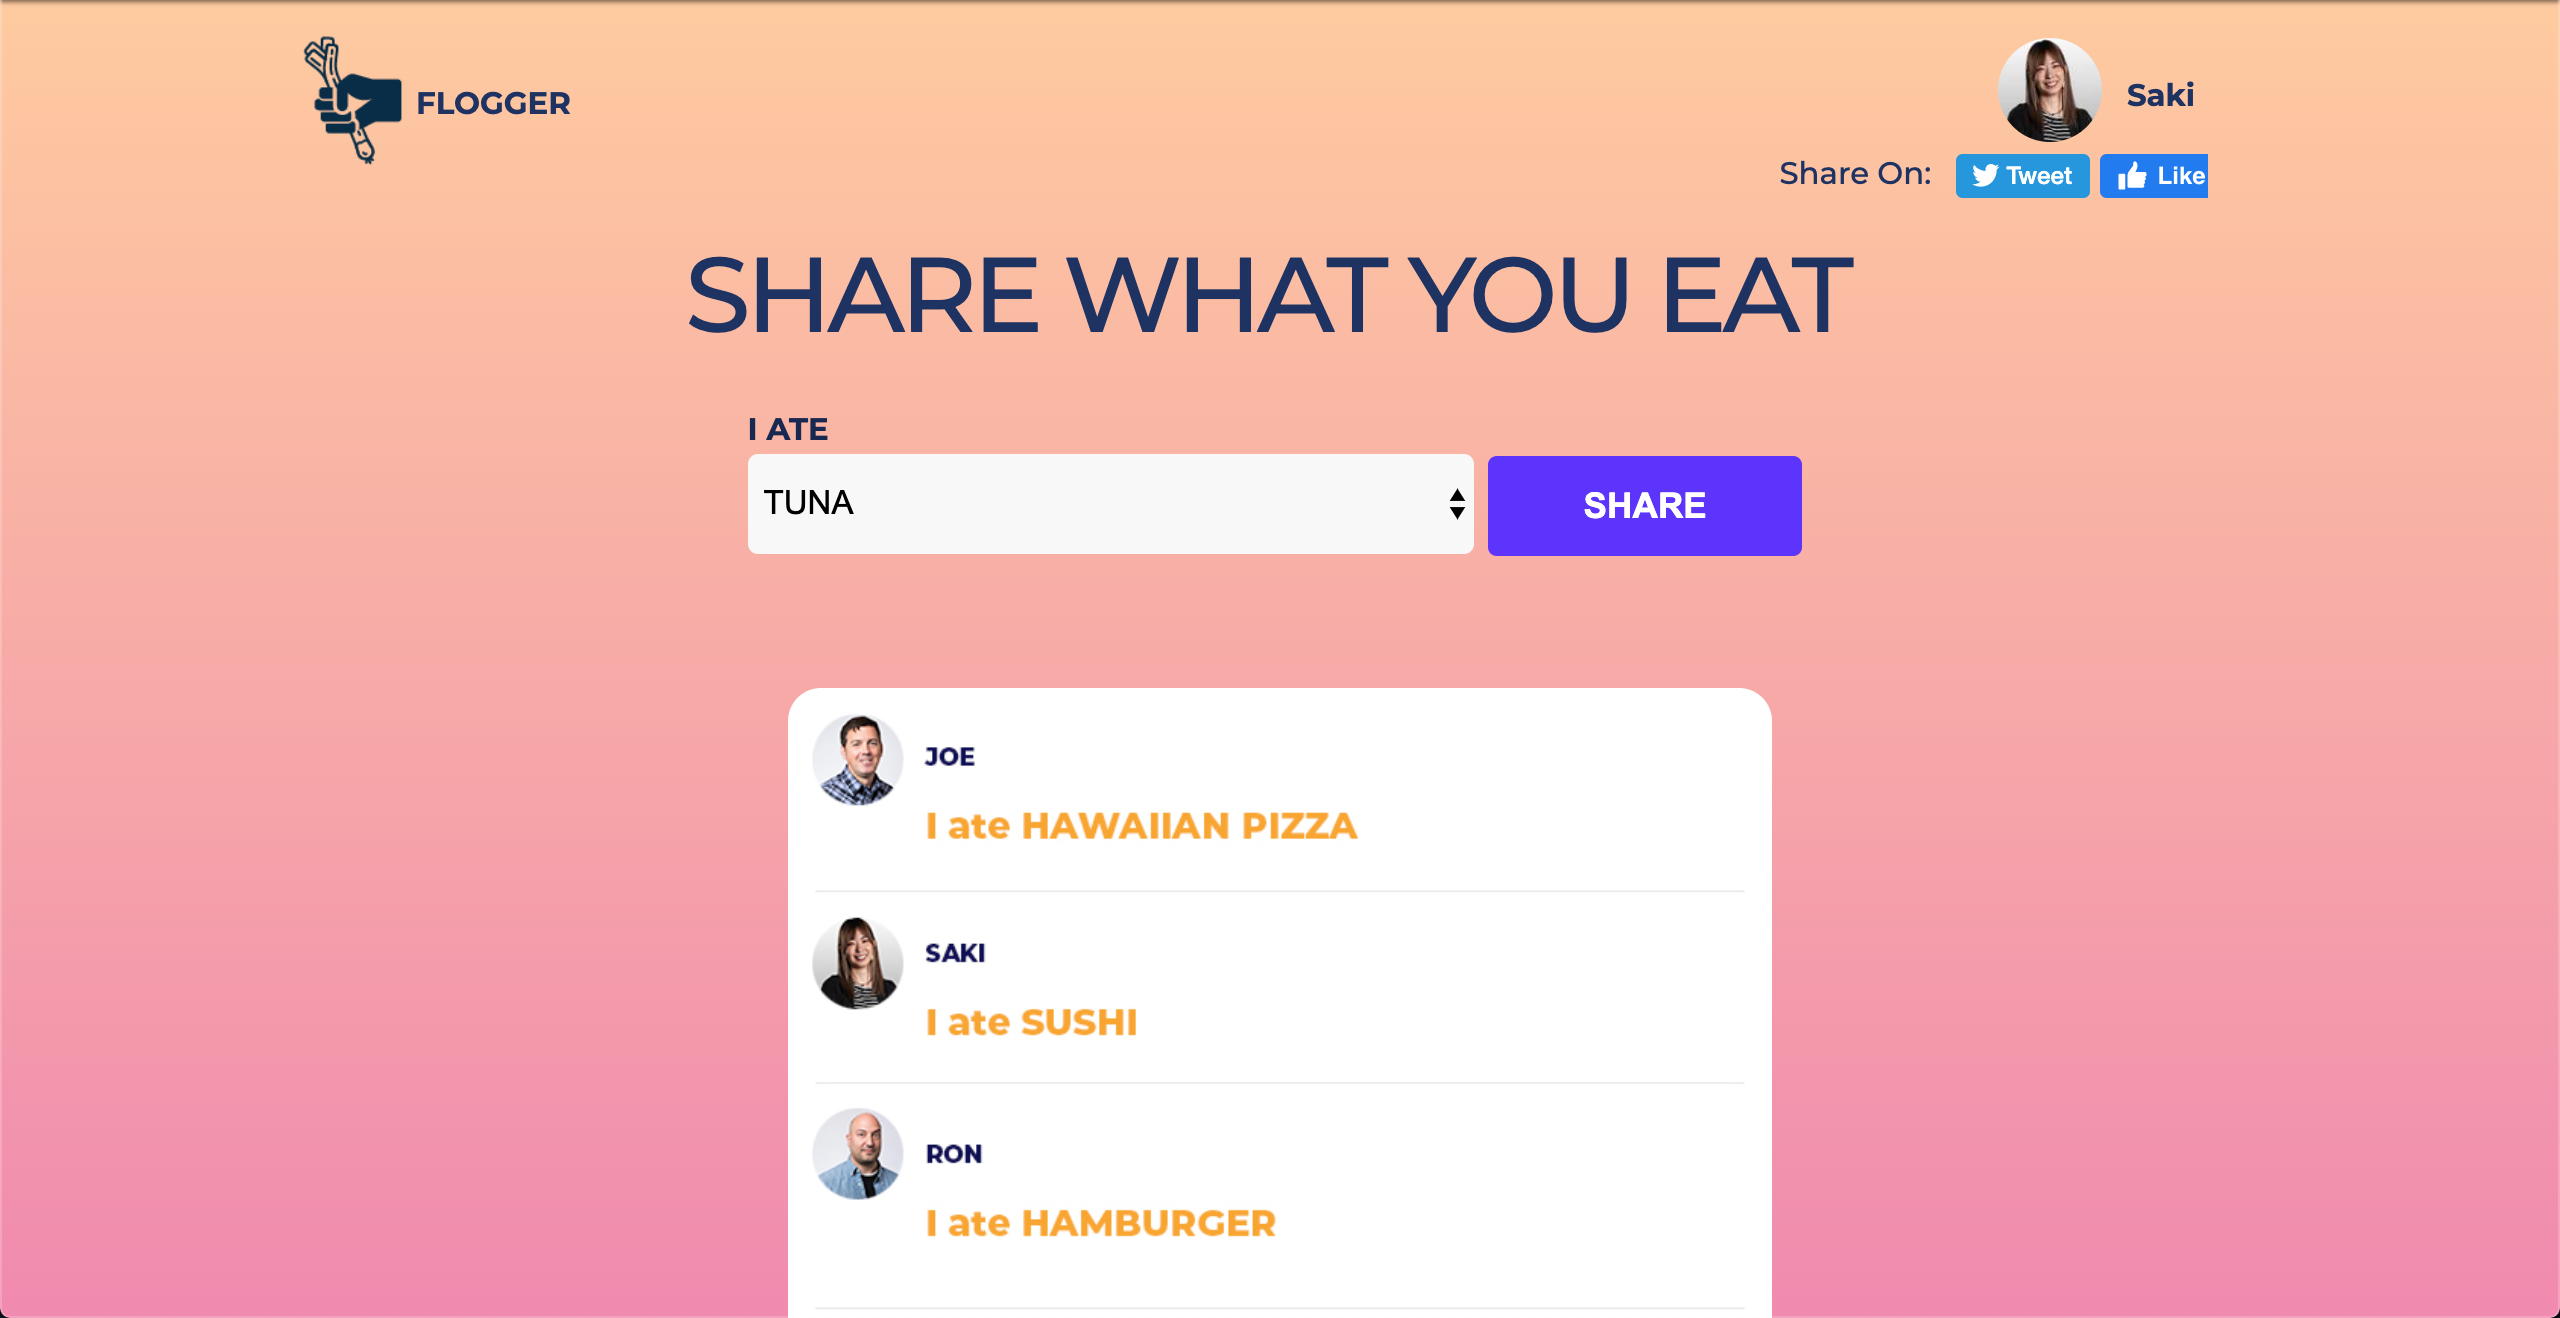
On to Coding!
In order to create an initial web app, we only need to run one command, npx create-react-app floggr. This gives us a very basic website that only run locally. We stripped out the initial React code and replaced it with some our food list combobox and food feed view. Our database for the food list would just be local mock one for the duration of the project, since the main goal was to publish what the users had selected from that list. The initial Amplify setup took about five minutes. After that all we had to do was run amplify add hosting and our web app was live around the world!
Auth
In order to use Auth all we had to do was run amplify add auth from the console, then import withAuthenticator high order component(HOC) from React Amplify. During setup we opted for a simple non-federated account. After that, all we had to do was add one line of code, export default withAuthenticator(<App/>, true);.With that addition our app was now hidden, replaced by the default AWS themed create account/sign in page. Upon creating an account and signing in our app was now visible. Magic!
You may have noticed the true flag in the withAuthenticator call. That flag triggers a greetings banner with the user name and sign out button at the top of the page, styled with the default AWS theme. The banner has very few options for configuration. You may have also noticed that our UX mock up contains a user name, avatar, and logo in the banner. We would somehow need to provide a custom banner to implement our banners features. Our custom banner would incorporate the sign out button even though it was not in the mock up. However, incorporating the custom banner led to a minor headache.
Most social media sites allow users to view the public feed when signed in. In order to show the feed when the user was signed out, we needed to remove the withAuthenticator HOC and and use an Authenticator React component in the code. Authenticator provides two ways to override its default components via its React properties, or props. One way is by setting adding the prop hideDefaults="true". This hides all of the default components, but we want to only override one and still leave the rest. According to the documents the second way to override an Auth component is by hiding just one component via the hide prop: hide={[Greetings, ...other components you wish the hide]}, and then setting the overriding Auth component's override prop to the component name you wish to override, override="Greetings". However, this did not work for us, even though we also tried passing the component as a string and as a rendered React component.
Due to the time constraints, we had to import the rest of the Auth components and render them manually inside the Authenticator in order to use our custom banner. It was an inconvenience, but considering what Auth provided, it was forgivable. Also, Auth still allowed us to implement a custom banner with fairly low effort. After that, development of the custom banner itself was fairly straight forward except for avatar. The avatar will be covered in the next post about Amplify Storage.
Thank you for reading, see you next time in Part 2 - Storage!