HTML & CSS
HTML5 canvas resources for beginners
Learn how to use the HTML5 canvas element to enhance your web applications with animations and graphics through these beginner-friendly resources.
Now that WatchOS 2.0 is released we have more than just frame animations in the SDK. It now has animation support for moving things around on-screen.

Now that WatchOS 2.0 is released we have more than just frame animations in the SDK. It now has animation support for moving things around on-screen. It's not terribly powerful because it is based on their layout engine. The layout engine organizes content by Group, Image and Alignment. If it were D&D alignment it would be Lawful Neutral, which doesn't sound fun, but it's not even that much fun; it's alignment to a parent element (left, right, top, bottom). Many properties are animatable, though, including alignment, width/height, background color/image, color and tint color.
Now that code is executing on extensions that are actually running on the watch, it is possible to trigger animations that can reveal or change around visual elements. We'll focus on animating the basic properties first.
Tutorial:
We'll make a little sample application that demonstrates property animations on watchOS 2. You'll need Xcode 7 or newer. I am using Xcode 7.1 beta 2 at the time of writing.

Create a new Xcode project. In the 'choose a template' menu choose 'watchOS'->Application.
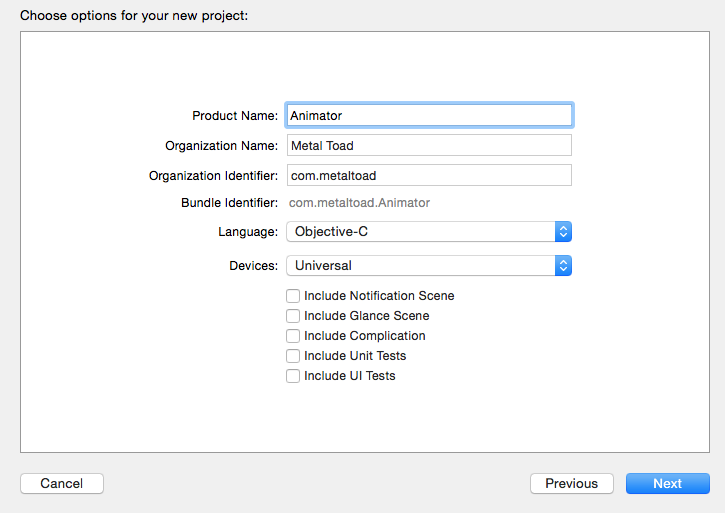
I'll name my project 'Animator', but you can name it whatever you'd like. For the Language select Objective-C. I personally love Objective-C, and although I have learned Swift, I am reticent to use it even though it has solidified with Swift 2.0 recently. To make it simpler we'll not use a notification scene, nor unit testing, so all of the checkboxes will be blank.
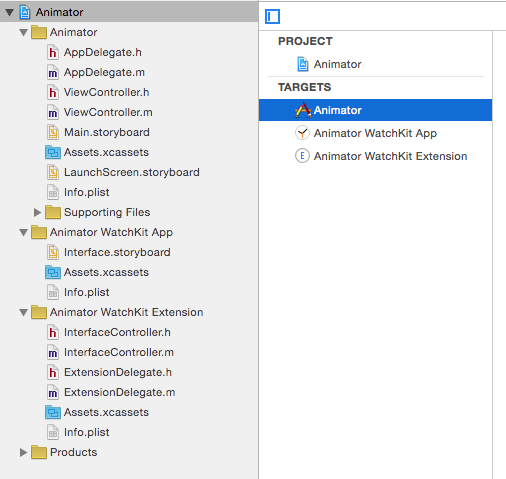
Looking at the project structure we see that we actually have more than one app here. WatchOS apps are hosted inside an iOS app. The left drawer in Xcode, the Navigator, shows four main folders: Animator, our iOS app, Animator WatchKit App and Animator WatchKit Extension, as well as a Products folder. The first folder can be put together like any other iOS app. The WatchKit App will be where our WatchKit storyboard and assets will live and the WatchKit Extension will be where our code will execute. Since WatchOS 2.0, it now executes the Extension on the watch itself (previously it was run on the iOS device).
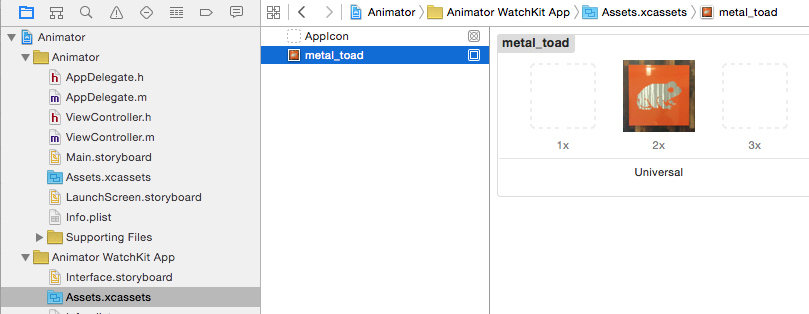
To start off I'm going to add my image, the Metal Toad that sits in the lobby of our offices. We only want pngs and it needs to be named @2x to get the sizing correct. Open up the Assets catalog in the WatchKit App and drop the image under 'AppIcon'. This image is 290x290 so it should fit fine in our app (Apple watches are 272x340 and 312x390).
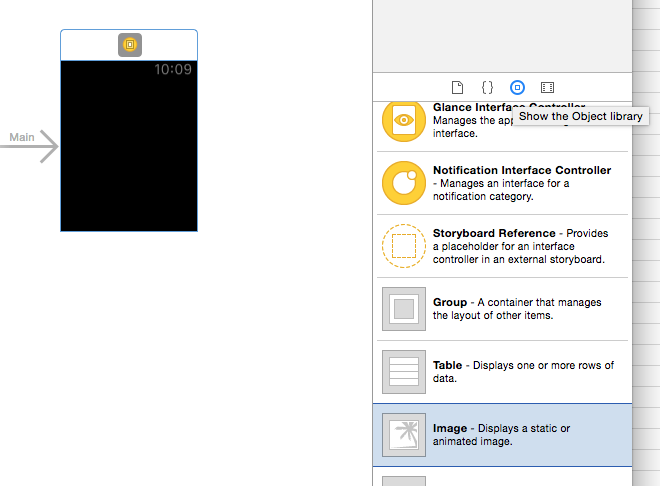
Now we'll jump into our storyboard in the WatchKit App. Show the utilities drawer on the right and then select the Object Library and drag in an 'Image'. It is actually a WKInterfaceImage.
I've chosen my image by selecting it in the 'Image' box inside the Attributes Inspector.
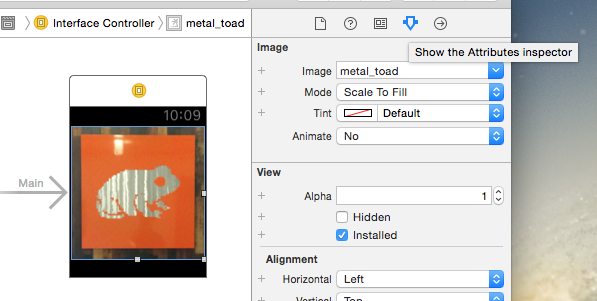
But wait, this fills the entire screen? I'll change the mode to 'center' and my image shows even bigger with a bit cropped off on each side. What is happening?
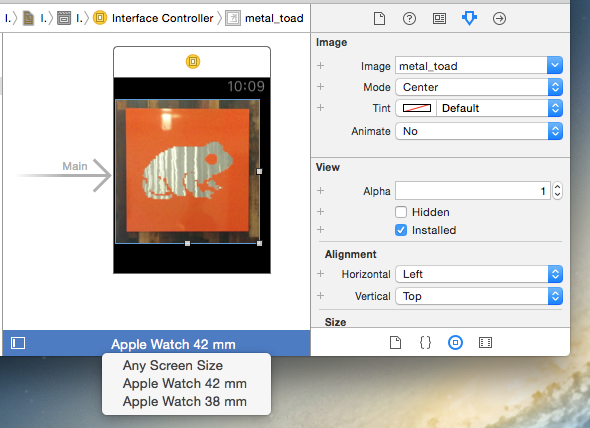
Well, our asset is 2x and our screen size is 2x, therefore we're programming for 136x170 and 156x195 screens respectively. That means our 290x290 image shows up as 145x145 and natively sized shows up larger than the 38mm screen and slightly smaller than the 42mm size. We can see the difference between these by choosing these watch views on the bottom of the storyboard. It usually says 'Any Screen Size' but you can switch it to either specific watch size.
I won't get into it here but you actually can make different storyboard settings for each specific device so you don't have to do that in code. Right now we'll just focus on doing our animation.
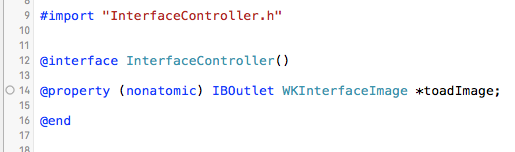
So let's jump into the code. Open up the InterfaceController.m file inside of the WatchKit Extension. This is the screen of information that we were just playing with in the storyboard. We want to hook up our Image in our code. Add this line between the @interface and @end lines:
@property (nonatomic) IBOutlet WKInterfaceImage *toadImage;
An empty circle shows up, showing that we have not yet made the connection to this outlet.
Jump back to the storyboard, hold the control key and drag from the yellow circle at the top of our Interface to our image. The outlet will show once you drag, connect it.
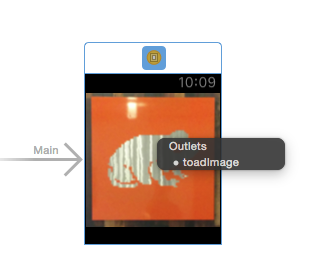
Back to InterfaceController.m and we see that our WKInterfaceImage's outlet is now connected.
We'll want to add a new method, one of the methods from WKInterfaceController, didAppear. And we'll make a little animation happen when our app comes up.
- (void)didAppear {
    [self animateWithDuration:1.0 animations:^{
        [self.toadImage setHeight:100.0f];
        [self.toadImage setWidth:100.0f];
        [self.toadImage setAlpha:0.5f];
    }];
}
Run that and see what happens. What? Nothing? A blank iPhone app?
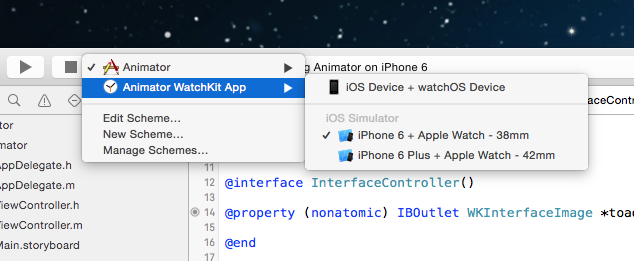
We actually need to select our target in the schema menu as well.
Ok, run now! Ok, we've got a watch emulator coming up too.
So, our image is just moving a bit since we aren't resizing the image with the size of the WKInterfaceImage. Also both of our animations are happening at the same time. That is fine in some instances, but for doing animations for a game that just won't suffice. We'll deal with that in a moment though.
First we'll add a couple buttons to do some more advanced things.
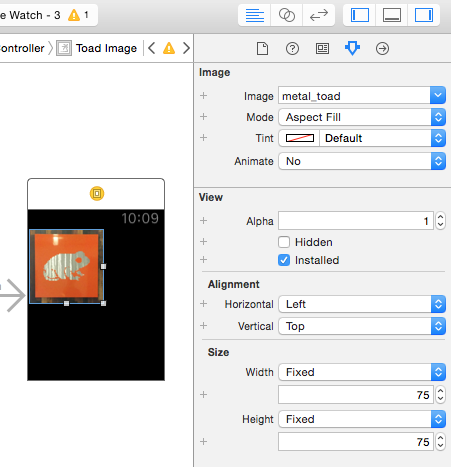
Go back into the WatchKit App storyboard. First we're going to make our image smaller by clicking on the image and then showing the attributes inspector. Set mode to 'Aspect Fill' and the width and height to 'Fixed'. Give them both a value of 75.
Next drop in a 'Group' and see that in the Attributes Inspector that the layout is 'Horizontal'. This group will hold our buttons. Also change the alignment to be 'Bottom'. Then drop a button into the group and resize the width to 'Fixed' 40 and label it '1'. Make two more buttons with the same width named '2' and 'R'. These will be our two animations and then a reset button.
Now let's make some methods in our Controller to handle the action events from the buttons.
-(IBAction)animOne:(id)sender {
}

-(IBAction)animTwo:(id)sender {
}

-(IBAction)animReset:(id)sender {
}
Then connect them in our storyboard by holding control while dragging from the button to the yellow circle above the interface controller.
Next we'll add a completion block to the animations that we've been given. This will allow us to chain animations more easily.
Make a file inside the WatchKit Extension named WKInterfaceController+Animation.h
This is a category that will extend WKInterfaceController. Categories allow us to add methods to a base class without subclassing. In this case we're adding a completion block to the animation method already existing. This will allow us to execute code right when an animation is complete. For our usage it will allow us to make nested animations that fire right after each other.
#import <WatchKit/WatchKit.h>

@interface WKInterfaceController (Animation)


- (void)animateWithDuration:(NSTimeInterval)duration
                 animations:(void (^)(void))animations
                 completion:(void (^)(void))completion;

@end
////WKInterfaceController+Animation.m
#import "WKInterfaceController+Animation.h"

@implementation WKInterfaceController(Animation)


- (void)animateWithDuration:(NSTimeInterval)duration
                 animations:(void (^)(void))animations
                 completion:(void (^)(void))completion {
    //ok do the animation now
    [self animateWithDuration:duration animations:animations];
    //wait for the animation to complete.
    int64_t delay = duration;
    dispatch_time_t time = dispatch_time(DISPATCH_TIME_NOW, delay * NSEC_PER_SEC);
    dispatch_after(time, dispatch_get_main_queue(), ^(void){
        completion();
    });
}

@end
Now we'll actually put in our animations. Go into InterfaceController.m and import our new file.
#import "WKInterfaceController+Animation.h"
Drop into animOne: and type in this:
-(IBAction)animOne:(id)sender {
    [self animateWithDuration:1.0 animations:^{
        [self.toadImage setAlpha:0.0f];
        [self.toadImage setHeight:10.0f];
        [self.toadImage setWidth:10.0f];
    }];
}
Then in the reset method let's be able to bring it back.
-(IBAction)animReset:(id)sender {
    [self animateWithDuration:1.0 animations:^{
        [self.toadImage setAlpha:1.0f];
        [self.toadImage setHeight:75.0f];
        [self.toadImage setWidth:75.0f];
        [self.toadImage setHorizontalAlignment:WKInterfaceObjectHorizontalAlignmentCenter];
        [self.toadImage setVerticalAlignment:WKInterfaceObjectVerticalAlignmentCenter];
    }];
}
We forgot to take out our initial animation. Comment out the code in didAppear:.
Now let's make this a bit more interesting and chain the animations so it gets smaller and reduces opacity, then once that is over, changes the opacity (alpha) back to 100% (1.0f).
-(IBAction)animOne:(id)sender {
    [self animateWithDuration:1.0f animations:^{
        [self.toadImage setAlpha:0.0f];
        [self.toadImage setHeight:10.0f];
        [self.toadImage setWidth:10.0f];
    } completion:^{
        [self animateWithDuration:0.5f animations:^{
        [self.toadImage setAlpha:1.0f];
        }];
    }];
}
Now to add a little more movement we'll put in a group to move our image offscreen.
To do this we'll make a group that aligns left. We'll make a member variable to hook it up, then we'll make it width 0 and height 0 to start out with.
Put this line in the @interface of the IntefaceController.m:
@property (nonatomic) IBOutlet WKInterfaceGroup *moveGroup;
Then hook it up in the storyboard by control-dragging from the interface controller to the group. Now to just totally go crazy we'll make the group grow beyond the bounds of the screen. Everything will move around it and then it will transition back. The great thing about the extra animation completion block is that we can chain animations to happen right after each other to make something actually look alive.
-(IBAction)animOne:(id)sender {
    [self animateWithDuration:1.0f animations:^{
        [self.toadImage setHeight:10.0f];
        [self.toadImage setWidth:10.0f];
        [self.toadImage setHorizontalAlignment:WKInterfaceObjectHorizontalAlignmentRight];
        [self.toadImage setVerticalAlignment:WKInterfaceObjectVerticalAlignmentBottom];
    } completion:^{
        [self animateWithDuration:1.0f animations:^{
            [self.moveGroup setHeight:400.0f];
            [self.moveGroup setWidth:400.0f];
        } completion:^{
            [self animateWithDuration:0.5f animations:^{
            } completion:^{
                [self animateWithDuration:1.0f animations:^{
                    [self.toadImage setHorizontalAlignment:WKInterfaceObjectHorizontalAlignmentCenter];
                    [self.toadImage setVerticalAlignment:WKInterfaceObjectVerticalAlignmentCenter];
                    [self.moveGroup setHeight:0.0f];
                    [self.moveGroup setWidth:0.0f];
                }];
            }];
        }];
    }];
}
For our final property animation we can make button number 2 animate from corner to corner.
-(IBAction)animTwo:(id)sender {
    [self animateWithDuration:1.0 animations:^{
        [self.toadImage setHorizontalAlignment:WKInterfaceObjectHorizontalAlignmentLeft];
        [self.toadImage setVerticalAlignment:WKInterfaceObjectVerticalAlignmentTop];
    } completion:^{
        [self animateWithDuration:1.0 animations:^{
            [self.toadImage setHorizontalAlignment:WKInterfaceObjectHorizontalAlignmentRight];
            [self.toadImage setVerticalAlignment:WKInterfaceObjectVerticalAlignmentBottom];
        }];
    }];
}
//That's it!!!! Get the full code on Github.
Learn how to use the HTML5 canvas element to enhance your web applications with animations and graphics through these beginner-friendly resources.
Explore the potential of CSS3 animations for front-end development, including browser support, examples, and tools to streamline the creation process.
In ToadCast 019, Metal Toad PM Matt Payton helps me interview Tom Martin who was recently promoted to Senior Development Strategist at Metal Toad. We...