The goal is to create a project with SpriteBuilder and then not use the nice GUI and ccb files that it provides. This may enable you to convert an already-made project or to use other tools for your GUI or just to do everything in code.
To make a project you need to go into SpriteBuilder and pick File->New Project from the menu.
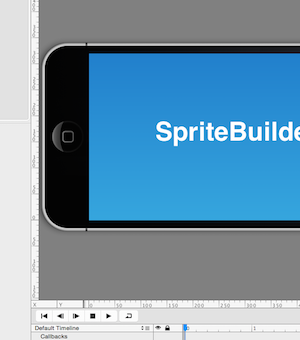
It give you a new project with a blue gradient background and a CCLabelTTF that says 'SpriteBuilder'.

Again go to the File menu and select 'Publish'. Then in File menu again choose 'Open in Xcode'. Sprite builder makes a full Xcode project within the projectname.spritebuilder package. Should you look at the project file SpriteBuilder saved you would see a folder icon but it won't let you open it in the finder. To see the Xcode project you need to right click (control-click) to 'Show Package Contents' to get into the folder. There you will see the Xcode project and all or files including the .ccb file which SpriteBuilder makes.
Once in the Xcode project we can see that we've got a MainScene object with .h and .m files. This is our main scene that we are going to use to completely take over the project. Currently it's just a subclass of CCNode. Change that to CCScene.
@interface MainScene : CCScene
{
    GameNode *gameNode;
}

@end
GameNode doesn't exist yet, so let's add that. File->New File, on the left column choose iOS->Source and then 'Cocoa Touch Class'. It will be named GameNode and will be a subclass of CCNode. After it is saved we can go back into the MainScene.h and add the import.
Ok, we're ready to replace the original scene. Let's find the AppDelegate.m. In Xcode like to use cmd-shift-O. Ok, Look for the startScene method:
- (CCScene*) startScene
{
    return [CCBReader loadAsScene:@"MainScene"];
}
Now we need to think about the scope of our nodes. We'll use MainScene for almost nothing and then have a GameNode and perhaps a hud scene inside of it. Most of the game stuff will be in our GameNode. Let's get this MainScene showing up first. Inside AppDelegate.m change startScene to this:
Add the next code above '@implementation AppController' in AppDelegate.m
@interface AppController()
{
    MainScene *mainScene;
}
@end

- (CCScene*) startScene
{
    mainScene = [MainScene node];
    return mainScene;
}
We'll also add our GameNode into the scene -onEnter.
-(void)onEnter {
    [super onEnter];
    gameNode = [GameNode node];
    [self addChild:gameNode];
}
The onEnter method is one of many that we can override to get more functionality. There is also onEnterTransitionDidFinish, onExit and onExitTransitionDidFinish, touchBegan:, touchCancelled:, touchEnded:, etc. We'll pop over to the GameNode.m and fill in this code.
@implementation GameNode

-(void)onEnter {
    [super onEnter];

    [self setContentSize:CGSizeMake(568, 320)];

    CCLabelTTF *testLabel = [CCLabelTTF labelWithString:@"This worked!" fontName:@"Helvetica" fontSize:14.0f];

    testLabel.position = ccp(self.contentSize.width/2,self.contentSize.height/2);
    testLabel.color = [CCColor colorWithRed:1.0 green:1.0 blue:1.0];
    [self addChild:testLabel];
}

@end
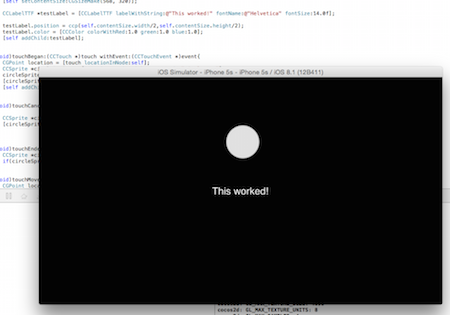
We are setting the contentSize for GameNode to be 568x320 points. This is iPhone 5s and 6 size. It is probably not the best solution, but for the purposes of this demo it will be fine. The next thing is that we are making a label that says 'This Worked!'. Without setting contentSize on GameNode it would have then showed up in the lower left corner of the screen (which is where our origin (0,0) is at).
Let's go a step further and drop a circle under our finger. Add the circle graphic to your project. Then we'll make our GameNode accept touches. In GameNode.m go into -onEnter and under the call to [super onEnter];
self.userInteractionEnabled = YES;
In the same file drop this bit of code:
-(void)touchBegan:(CCTouch *)touch withEvent:(CCTouchEvent *)event{
    CGPoint location = [touch locationInNode:self];
    CCSprite *circleSprite = [CCSprite spriteWithImageNamed:@"circle.png"];
    circleSprite.name = @"circle";
    [circleSprite setPosition:location];
    [self addChild:circleSprite];
}

-(void)touchCancelled:(CCTouch *)touch withEvent:(CCTouchEvent *)event {

    CCSprite *circleSprite = (CCSprite *)[self getChildByName:@"circle" recursively:NO];
    [circleSprite removeFromParent];

}

-(void)touchEnded:(CCTouch *)touch withEvent:(CCTouchEvent *)event {
    CCSprite *circleSprite = (CCSprite *)[self getChildByName:@"circle" recursively:NO];
    if(circleSprite) [circleSprite removeFromParent];
}

-(void)touchMoved:(CCTouch *)touch withEvent:(CCTouchEvent *)event {
    CGPoint location = [touch locationInNode:self];
    CCSprite *circleSprite = (CCSprite *)[self getChildByName:@"circle" recursively:NO];
    if(circleSprite){
        circleSprite.position = location;
    }
}
What this is showing is that these methods all work together and also that Cocos2d manages an object scene graph for us. That means we don't need to keep references to objects, we can just ask the parent for them by 'name'.
In touchBegan we first translate the touch to the point location of our parent. Then we create a CCSprite. The size is given by the size of the image. We then give it a name so we can retrieve it later. Then we give it the translated location and add it to gameNode.
Both -touchCancelled: and -touchEnded: look for our sprite from the parent and verify that it is not null then remove it from the parent.
The last method, -touchMoved: grabs the circle and resets the location under our touch.

So that's it. I didn't get into replacing scenes but what's going on behind the scenes is that CCDirector is pushing our CCScene (MainScene) onto the stack and then you can mange it with CCDirector from there.