Last week we touched on SASS and it's importance to the developer workflow. We also walked through an introduction of Drush and Capistrano. Both of those tools are key environment tools for anyDrupal/PHP configuration. In this week's episode, we'll be revisiting the Git workflow in greater detail. I was originally going to discuss Capistrano too but quickly realized that would make for a really long blog post so I will save Capistrano for next week. However, I will say that they both have a similar role in helping you organize your data. As usual we will round out our chat with my AHA! and FAIL moments of the week.
Push it!
One of the most nerve racking experiences for me the first few times I did it was pushing my progress down the chain once I had my feature working correctly. Whether you are a junior or a senior, getting a feature to work always takes a decent amount of time and effort. So, after all that, you really don't want to accidentally overwrite that progress or someone else's for that matter. In order to work effectively with Git, you need to understand what it does for you. We touched a bit on this in Episode 1 and mentioned that Git is a revision control system for sharing, tracking, and collaborating source code.
Even though development environments vary from agency to agency, there are general steps to handling data in regard to your database and your source code. Understanding these steps will go a long way in ensuring that you are using these tools properly and safely. In some ways, I look at Capistrano and Git as two aspects of the same tool. There are some key differences and I will touch on them here. For one, Git is a fast and effective tool due in part to the fact that it only saves the source code once. From that point, it only CRUD's (Create, Read, Update, Destroy) changes in that code. This allows for very granular control over versions or your source code hence, "revision control". It then takes that code and makes it available to anyone, anywhere. There is an option for private repository storage but that comes with a fee.
How?

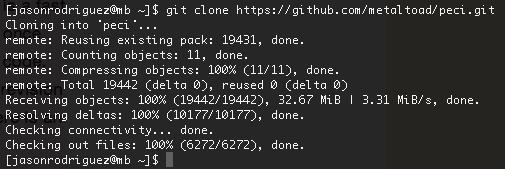
Generally when you start a project, the first thing you should do is clone the master copy of your project's repository in Github by running the git clone command, followed by the url of that repository. This will give you your own copy of the project. Think of the project as a tree with different branches. Each branch contains it's own special feature that adds to the overall capability of the project as a whole. Once you have a copy of the project, you should create a branch so you can work on your feature without disrupting any other branch and simultaneously ensuring the project is always in a usable state.
You can do so with the git branch command followed by the name of the feature you want to create.
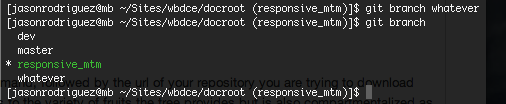
You must then checkout that branch so Git knows which clone of the master branch you are working in.

Similarly, you can check out that branch to start working in it with the git checkout command followed by the name or your branch.
Tip: You can use a shortcut and do both at the same time with git checkout -b followed by the name of the branch your want to create.
Follow Up!

As you work in your new branch be sure to periodically submit your progress as you work on your new feature. You'll want to first pull any changes that have happened in the master branch since you last checked it out. That way when you submit your data, it will include any changes anyone else may have made since you last checked out your current branch. You can then see if there are any conflicts. For instance, if you and someone else are working on different features but applying them to the same file, the first person to submit their changes to the master branch can potentially set up a conflict alert that Git will pop up when that second person tries to submit his changes to the master branch.
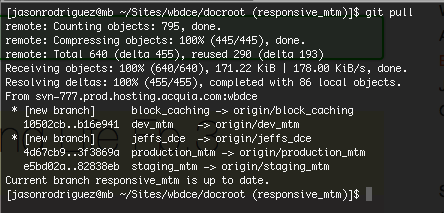
You can pull the changes by entering git pull followed by the branch you would like to pull from. Once you do that and resolve any conflicts (if they show up), you are ready to push your changes.
Now one other thing I mentioned in Episode 1 is the importance of git status and git diff. For details on this, feel free to re-visit my previous post here. git status allows you to check the status of your changes as in, which files have been modified, removed, created (new files show up as untracked) and git diff shows the difference between versions of a particular file line for line.
Once that is the way you like it, you can let github know which changes you want added to your branch by entering the git add command followed by the path of the file you want to submit. If you like, you can add all of your files in one shot by using a period like so : git add . Once your changes are added to the cue, commit them to the index on your local computer with git commit -m followed by a message in quotes explaining what you are committing.
I recommend adding files one at a time or adding them in groups that all contribute to a specific action. In this way, you anyone can easily go back and review the changes and be able to view the intention behind them. Otherwise, it might come back to bite you in the rear if there is a problem related to your submission. It can also be a real time saver in those situations as well. All in all, it is a best practice and I highly recommend you make a habit of doing it.
Make it so..

Ok, now just in case someone else pushed some data to your project while you were preparing yours, it is a good habit to do a quick git pull once more. At this point, we pulled new data from master, reviewed our changes, commited our own changes to our local index in preparation for deployment, and pulled once more to catch any last new data that may have popped up at the last minute. Finally we can push our work. There are options here depending on your own situation. You might want to just push your data to your own branch on the remote server, push it to all branches on the remote server, or push it to a staged server. Usually it would be the development server which acts as a collaboration point for all the devs on your team. Allow me to elaborate..
In the development cycle there are usually three servers : development, staging, and production. Each one of these servers contain a version of the full project and should remain fully functional at all times. The Development level is like a collaborative sandbox of sorts, Staging (otherwise know as the "gold" copy) is where you keep your demo ready code and also where your QA testers run their tests (if they don't have a dedicated server for that), finally production is the live site itself. Usually while working on things, you will almost always be pushing your features to your development server.
Again, every environment is different so bear that in mind. If you only want to push your changes to a specific origin, for example, if you need to push from the development server to the staging server. In this case, you will want to specify that server in particular but we'll get more into the deploy side of things next week when we discuss Capistrano.
Ok so this week's AHA! moment came to me when I was trying to get more familiar with the Google Chrome development tool and it turns out that whenever you see a line crossing out a style contributing to a given element in your html, it means that that same style is being overriden by another elemnt's style that has a higher specificity and it also targeting the element you are trying to style. above it superseded and changed it to something else. This is something really simple but it was something that I totally didn't catch until now. It cost me hours of spinning my wheels but the moment I figured that aspect of the tool out, I was able to solve my problem in less than 5 minutes! It certainly changed the way I look at solving problems and it helped me think outside of the box in terms of turning over new stones when I am presented with a problem instead of just looking at the stones that are already turned.
My FAIL moment of the week came to me when I couldn't figure out how to target a specific element of html on a page. It was nested inside of a div that wasn't specific enough to use. So, I was spinning my wheels thinking I had to work with what was given to me when in reality, making a new class to wrap the element I was trying to target, would have made more sense. So, eventually, I was told I could just use JQuery wrap function to have a new custom class wrap my target element. I failed to figure that out on my own but the good part is that I am learning and when we do that, we are always winning. This week my take away was to look in unexplored directions or you will just wind up spinning your wheels.
My question this week for you juniors is:
Name a coding issue you have struggled with that made you rethink your approach. Do you think refactoring your solution would unearth a best practice or just a different way of solving the problem with no visible benefit over your original approach?
Seniors :
When do you decide to take a new look at a problem that you have solved already in an effort to solve it more efficiently? Do you rely on gut instinct or are there tell tale signs?
That's it for this week, thanks for stopping by!