Update: Use this module
Old Method: Views can be very handy, but the views interface can be a little tricky. A question that comes up when training clients is "Why can't I edit this content?" when they are looking at a view. If you use the node row style Views will add them for you, but not if you're using the field style. You can surely explain how views work (results may vary depending on the client), but an even easier method is to create edit links that link directly to your content items. Using this method creates a handy little gear button when you roll over the content, with a link that says "Edit Content" when you click on it.
The latest version of views for Drupal 7 has revamped the UI. I'll be using this version in the examples, but the same technique can still be used in the old UI.
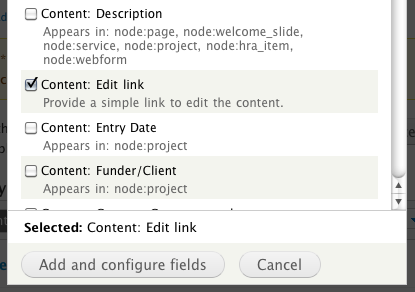
Step 1: Add the Edit Link field to your view
- In the latest version of Views this field is called "Content: Edit Link". In the previous versions it was "Node: Edit Link"
- Click Add under Fields and select the Edit Link
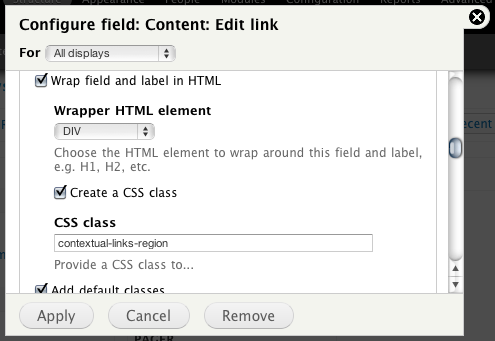
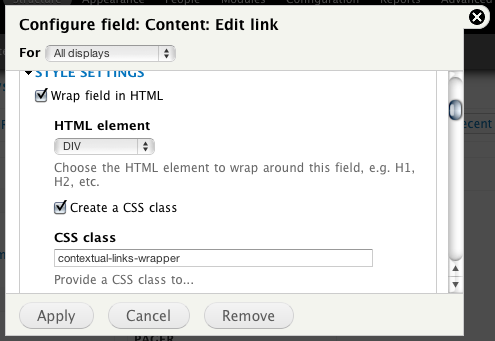
Step 2: Add the wrappers and classes
- Add a div wrapper to the entire field and label, and give it the class name of contextual-links-region .
- Add a div wrapper to the field itself and give it a class name of contextual-links-wrapper
Step 3: Rewrite the Field

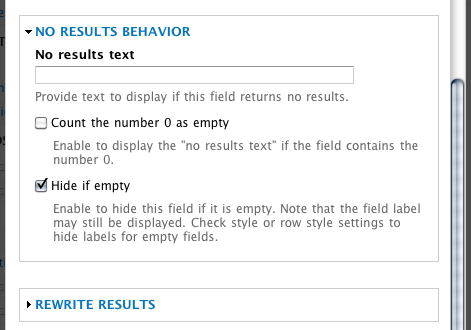
Step 4: Hide if empty
- Check the "Hide if Empty" checkbox.
Step 5: Add styles
- Make sure this new link doesn't interfere with other links. I usually add top:15; to the style of the links to ensure it doesn't mess with the "Edit View" link.
- Change the gear color. Now that you have this fancy button on every little content item, you may get some instances where the little grey gear is hard to see.
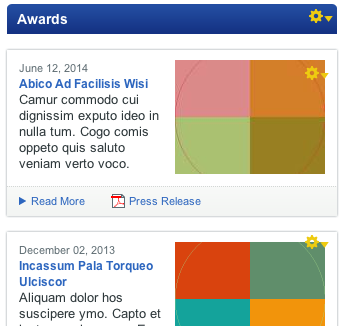
You can now see the gear button when hovering over the view. In a perfect world, the dotted line would wrap the entire content row and only appear when hovered over that piece of content, not the entire view, but using this method can add a very nice shortcut for your users quickly.