I recently had a chance to work on a data warehousing project for a client that wanted a centralized data repository of data from a number of analytics providers to run reports against for business intelligence purposes. For this project the client chose to work with AWS Snowflake a cloud data warehouse. In this blog post I’m going to discuss an overview of what Snowflake is, how it works, and talk a bit about some of the data loaders that I built to facilitate loading analytics data into the data warehouse. We'll take a look at the slick architecture used in Snowflake and some of its tools and features. Thanks to the folks supporting Snowflake who have been nothing short of amazing in terms of responsiveness to answering questions and their documentation is useful and to the point.
AWS Snowflake Architecture
Architecturally there are 3 main components that underlie the actual data warehouse. The 3 main components are as follows: Compute: Snowflake provides the ability to create “Virtual Warehouses” which are basically compute clusters in EC2 that are provisioned behind the scenes. Virtual Warehouses can be used to load data, or run queries and is capable of doing both of these tasks concurrently. These Virtual Warehouses can be scaled up or down on demand and can be paused when not in use to reduce the spend on compute. Storage: The actual underlying file system in Snowflake is backed by S3 in Snowflake’s account, all data is encrypted and compressed and distributed to optimize performance. By the very nature of Amazon S3 the data is geo-redundant and is backed by Amazon’s industry leading data durability and availability. Services: Coordinates and handles all other services in Snowflake including sessions, authentication, SQL compilation, encryption, etc. By design, each one of these 3 layers can be independently scaled and are also architecturally redundant. For more information about the underlying architecture visit Snowflake’s documentation here
Data Handling and Connecting To Snowflake
Snowflake is built to handle both relational and nonrelational data. Meaning you can create databases that are traditional relational DBs as well as document (more akin to NoSQL) DBs with record formats such as JSON and Avro. One of the slick features of this is that you can query across relational and nonrelational databases using JSON keys in your SQL query like this example:
select payload:app_version,payload: app,payload:parameters:attributes from app_data_json;
Connecting to your databases in Snowflake is relatively easy, there’s a few different methods to do so. One method is to use any of the supported ODBC drivers for Snowflake, or to use SnowSQL CLI (Install instructions are found here), or by using the Web based worksheet within your Snowflake account. For the project that I worked on, we used a Linux instance in Azure as a cron machine for executing API scraper scripts to acquire the data, and used SnowSQL on a cron to load the data into Snowflake.
Setting Up A Snowflake DB
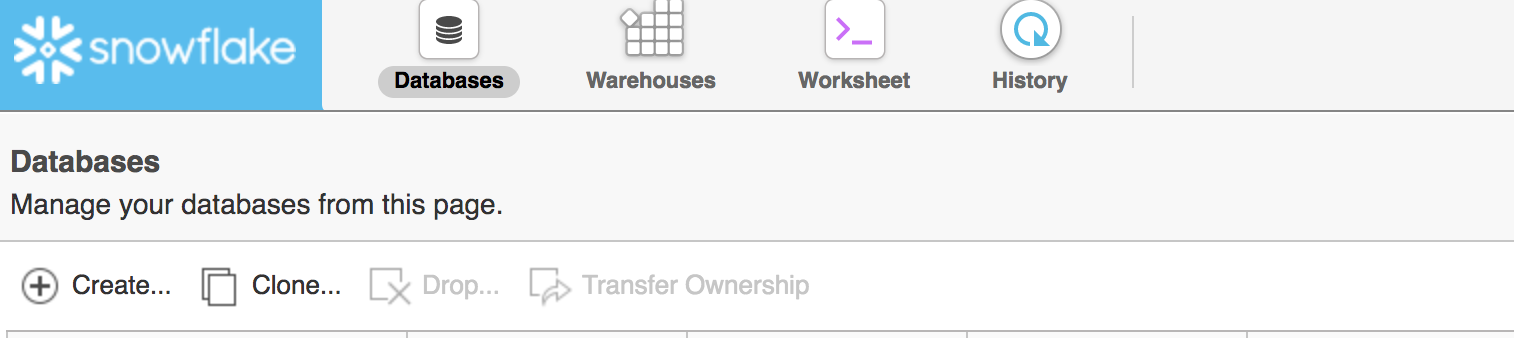
The first step once you’ve logged into your Snowflake account is to create a database. This can be done by clicking the Databases icon in the web interface and choosing the Create option.
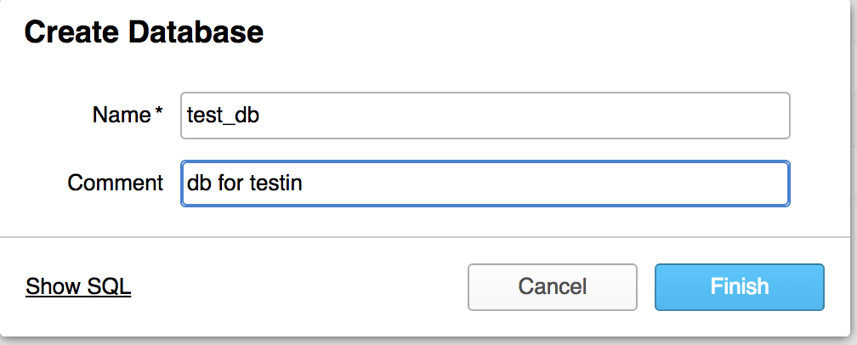
Once you’ve selected the create dialog you’ll receive a prompt to create a database name and optionally a description. You can also optionally click the Show SQL option if you want to get the exact syntax to script DB creation later using SnowSQL.
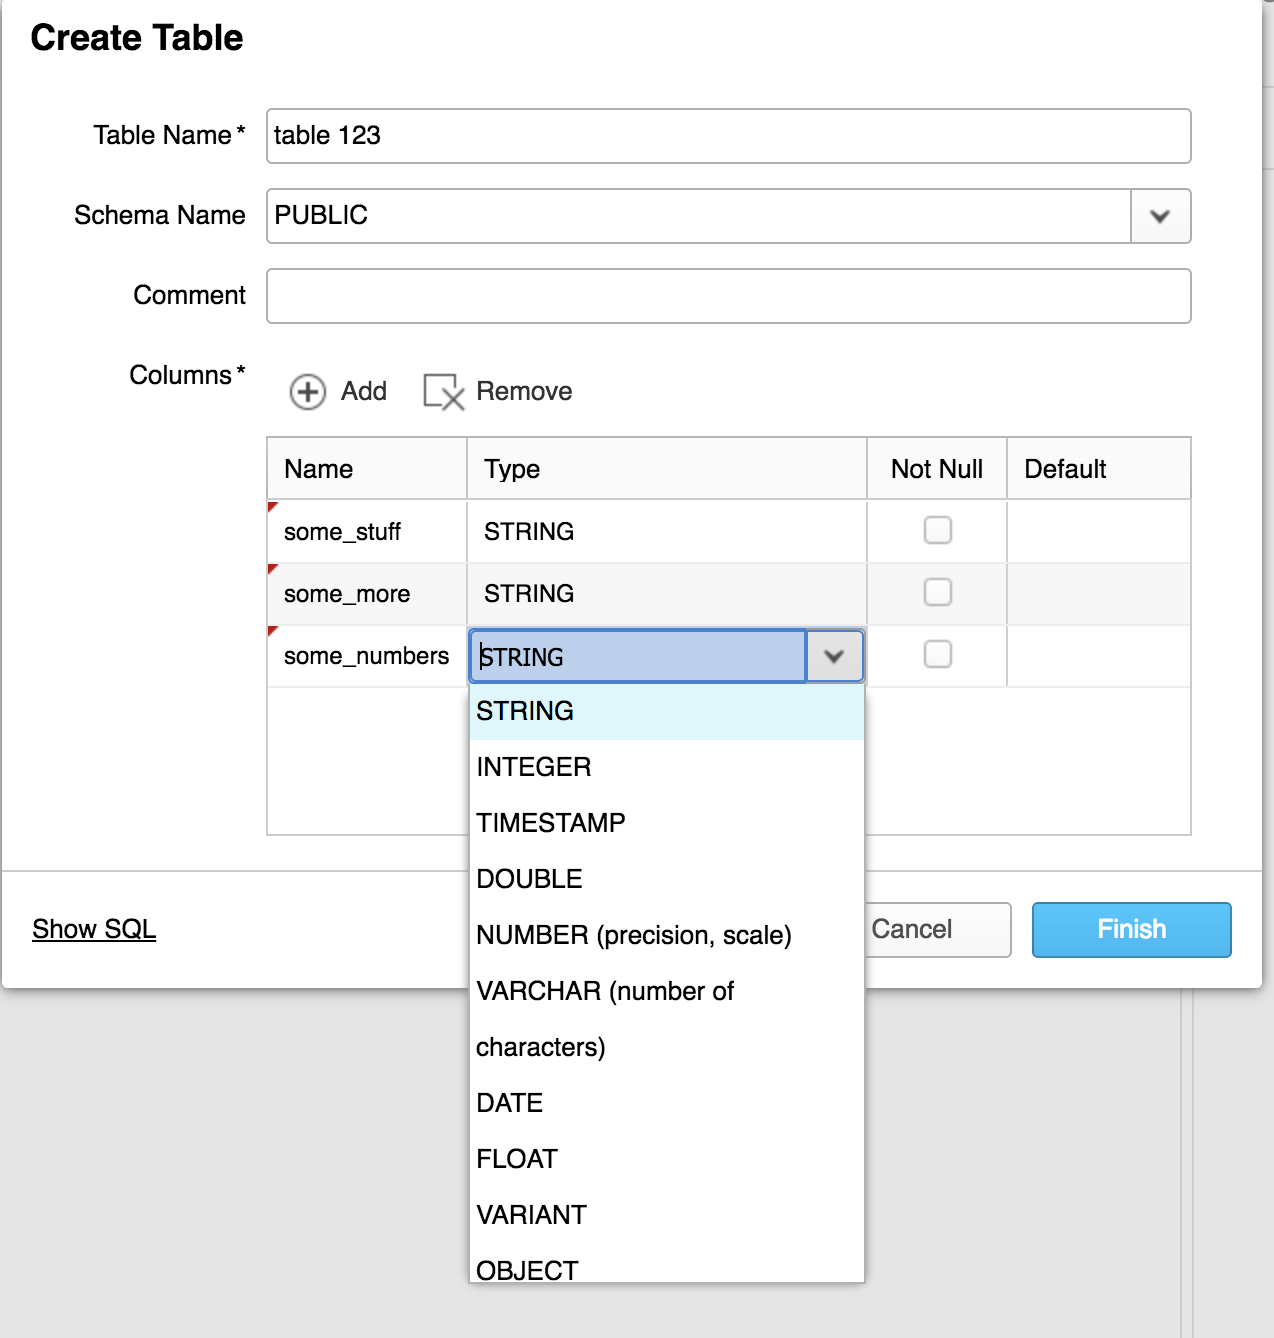
Now that we’ve created a database it's time to create a table. Do do this click on the database you just created and click the create button. Once you do this you’ll receive a web GUI in which you can name your table, and create your schema. Much like every other step in this process there is a Show SQL prompt at the bottom left of the window you can use to grab the CLI syntax for the same task.
Now that the database and table have been created we can load some data. Of course to load data we must first acquire it. I’ve created a Python based API scraper to scrape data from AppAnnie (a popular mobile analytics SaaS product) which will scrape specific data from the API and place it into a CSV file on the S3 bucket I’ve mounted on my filesystem using the S3FS fuse driver. See example here
Loading Data
Now that we have data syncing into an S3 bucket we created we can now set up our stage in Snowflake. When setting up a stage you have a few choices, you can either load the data locally, use a Snowflake staging storage, or provide info from you own S3 bucket. I have chosen that latter as this gives me long term retention of data for the future that I can reuse or repurpose down the road.
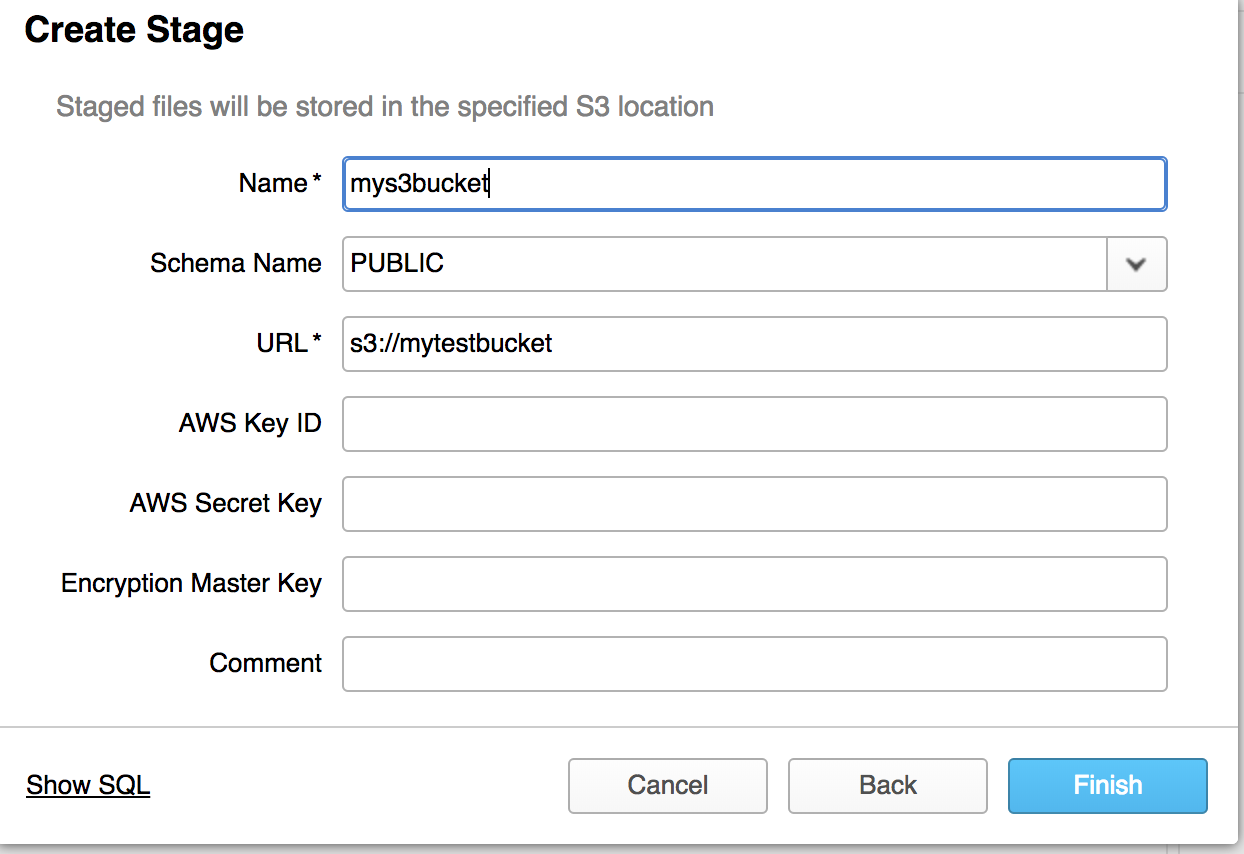
To create an S3 stage in Snowflake click on your database and click the stages tab. Once you’ve done this click create. You will need to give your stage a name (we’ll use this in a bit to setup a snowflake sync cron). You’ll also need to provide the s3 URL as well as AWS API keys. Once you’ve done this your stage will show up in Snowflake.
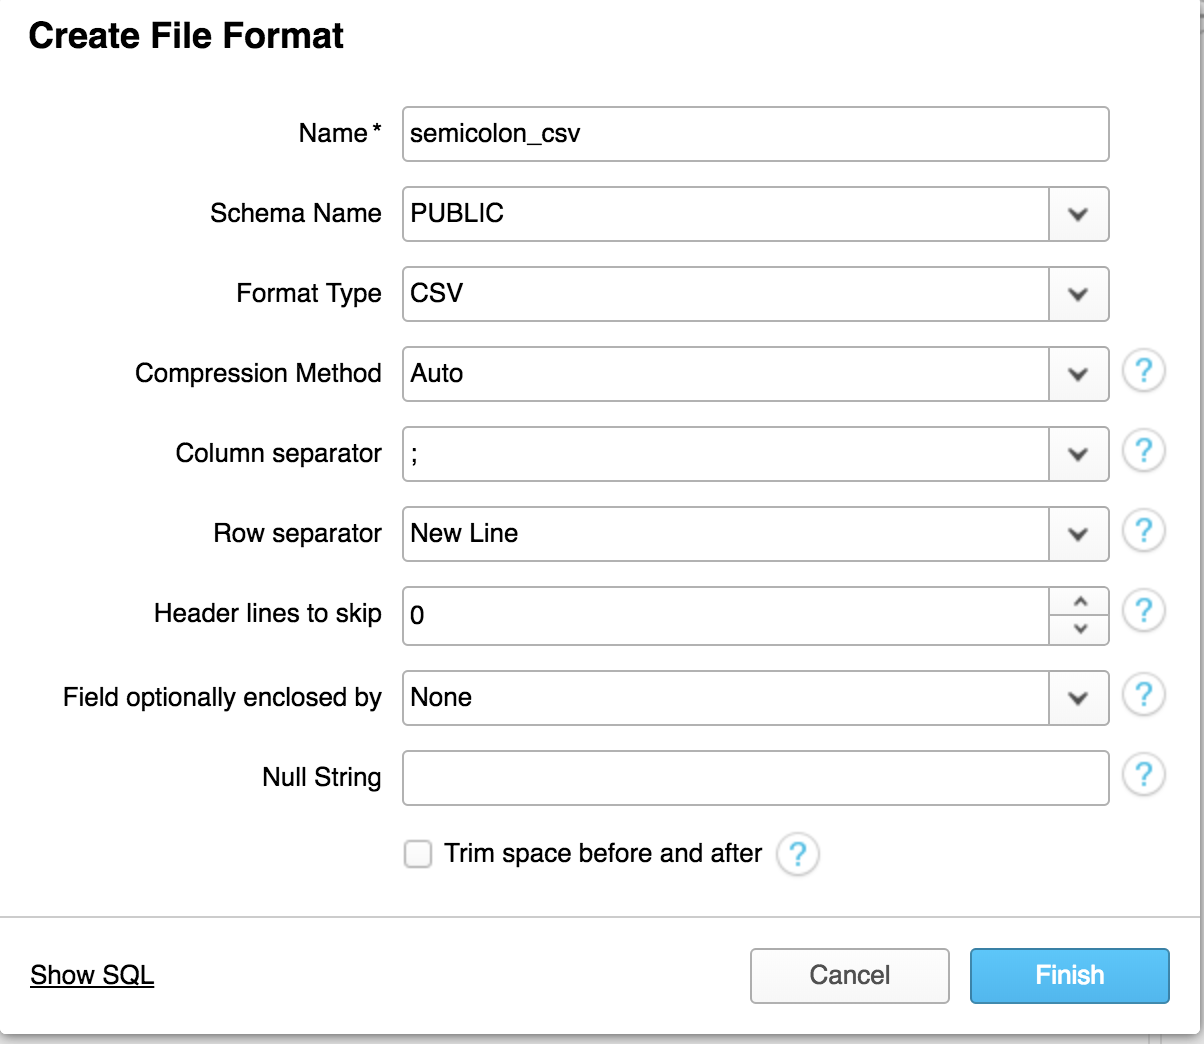
Now that we’ve set up a stage we will next need to setup a file format, this will tell Snowflake how to read the data that we wish to import. I’ve chosen semicolon separated CSV for my example. Click the File Formats tab in your database and click create. Once you do this you will see the following dialog box, fill this out according to your file format and click finish.
Assuming that you have SnowSQL installed on a Linux server that will run a cron to load data from the S3 stage, you’ll need to first setup a connection in your .snowsql/config file. A sample connection looks like this:
[connections.testdb] accountname = mytestaccount username = testuser password = testpassword dbname = test_db warehousename = LOAD_WH schemaname = public
Once you have saved this into your config file you will want to create a .sql file in your service account’s home directory with the information telling Snowflake what database and table to load the data into, where to load the data from and what file format to use when loading the data. Here is an example:
COPY INTO "TESTE_DB"."PUBLIC"."table 123" FROM '@"TEST_DB"."PUBLIC"."mys3bucket"' FILE_FORMAT = '"TEST_DB"."PUBLIC"."SEMICOLON_CSV"' ON_ERROR = 'ABORT_STATEMENT' PURGE = FALSE;
Once you’ve created this file you can setup crontab to run this with an entry similar to this (note this example runs daily at 17:00 UTC time:
0 17 * * * /home/example/bin/snowsql -c testdb -f /home/builder/snowflaktestdb.sql > /dev/null 2>&1
Final Thoughts
Getting to work on a project with Snowflake was in totality a really fun project. I have seen a number of data warehouse designs and approaches, and i believe there is no one size fits all solution. However, my take away from Snowflake is that it was super easy to setup, there is the right amount of options when it comes to provisioning dbs, data loading staging storage, and virtual warehouse provisioning for data loading and execution without having to worry about optimizing all of the underlying architecture and scaling it. The feature set given, the plethora of connectivity options, and flexibility to support relational and nonrelational data made this a fun technology to work with. Not only was it fun to work on a data warehousing project, but getting to write multiple API scrapers and automate the process of acquiring and loading the data end to end.